I made this for chess club at school to use as a demonstration board. The squares and lettering are black craft vinyl. Then I used my 2" circle punch to make green cardstock circles.
I cut the chess pieces out of vinyl and put the designs on the green circles. I laminated it at the office store instead of at the school because I wanted a stiff laminate. Then I glued magnets to the back. I used magnetic sheeting cut into squares (button magnets aren't necessary).
The imperfections are because I used scrap vinyl for the lettering and didn't worry about 100% perfect placement. I could have aligned the design perfectly in silhouette studio and then used transfer tape but that seemed like a waste of vinyl and tape when I had perfectly good scraps. :)
Things I would change - after putting the board on the white board I realized that the room we will use for chess club most of the time has a white board in it. So next time I might try making a laminated board/poster (using the school's thin laminate machine) to hang on the existing white board with magnets. It would be easier to carry around. But that being said, the first chess meeting we ended up in the library which doesn't have a white board so I'm glad I had this one.
Another note - I did use a chess piece design from the silhouette store, but I had to do significant point editing and other alteration to make the design the way I wanted it. It was still easier than starting from scratch though!
P.S. - Did you know that academic/tournament chess sets come with an extra queen? That's why you see an extra black and white piece on my whiteboard.
Showing posts with label vinyl. Show all posts
Thursday, February 6, 2014
Monday, February 3, 2014
Enter and Exit Signs in Vinyl
You will need the white background on both sides of the door. And it it easiest to apply the black lettering to the white before applying the decal to the door.
The signs have been up an entire school year and are still doing well. I used regular craft vinyl and not outdoor vinyl, but either would work.
I used Times New Roman font and a frame that was 10" by 4".
File: enter exit frame
Monday, January 20, 2014
Be YOU tiful Young Women - wood and vinyl craft
I recently got to craft with 20 or so young women ages 12-18. Every woman, young and old, needs to know inside herself and independent of any other voices that she is beautiful in the sight of her Creator. His love for her is unfailing and unconditional. The phrase "be-YOU-tiful" reminds me of this and I hope it reminds these girls of their divine worth and potential too.
Before the activity I cut the vinyl and the wood (1"x4"s cut into 12" pieces). Several ladies helped me sand them and paint them off white. At the activity the girls used sharpie markers to decorate the vinyl. Then they weeded the vinyl (removed the extra vinyl around the letters) and used transfer tape to put they vinyl on the wood. Several girls got creative and used the markers to further embellish their plaques. Some even wrote their favorite quotes on the back of the boards. It was a fun activity for me and for them.
Saturday, December 21, 2013
Race Medal Holders
A friend asked me to make one of these as a surprise gift for her husband who loves to run. She choose the quote "Always earned. Never given."
I used boards I already had cut and only had to buy the pegs and the hangers for the back.
| Gift for a teen who loves to run and choose not to run a big name marathon on Sunday even though his training partners did. Go Chandler! |
My eval:
- loved that I was able to make this for someone else. Their family has helped my family in many ways.
- and it gave me an excuse to do something for Chandler to tell him I really admire his courage in making the right choice
- it's nice to be able to use all my crafty "stuff" in meaningful ways
- happy I was able to find a runner and make a few modifications (remove the frame using point editing)
Improvements for next time (the perfectionist in me hasn't died yet):
- pick a dark background color and use light lettering
- could still be changed if the new owners want to paint over the vinyl and then remove the vinyl (reverse stenciling)
- install 2 hangers on the back so it will hang even when medals (weights) are added
- I think I'll retrieve the one I didn't do that on and fix it
- put the hangers on before gluing the pegs in
- add felt pads to the bottom corners so it hangs more evenly on the wall
- or finally learn how to use the key hole router bit I own
Trivia (or not):
"run medal holder" (note to self)
used silhouette studio image "sports badge set" design #30246
Arm Wrestler font
Labels:
exercise,
silhouette cameo,
vinyl,
wood
Thursday, September 26, 2013
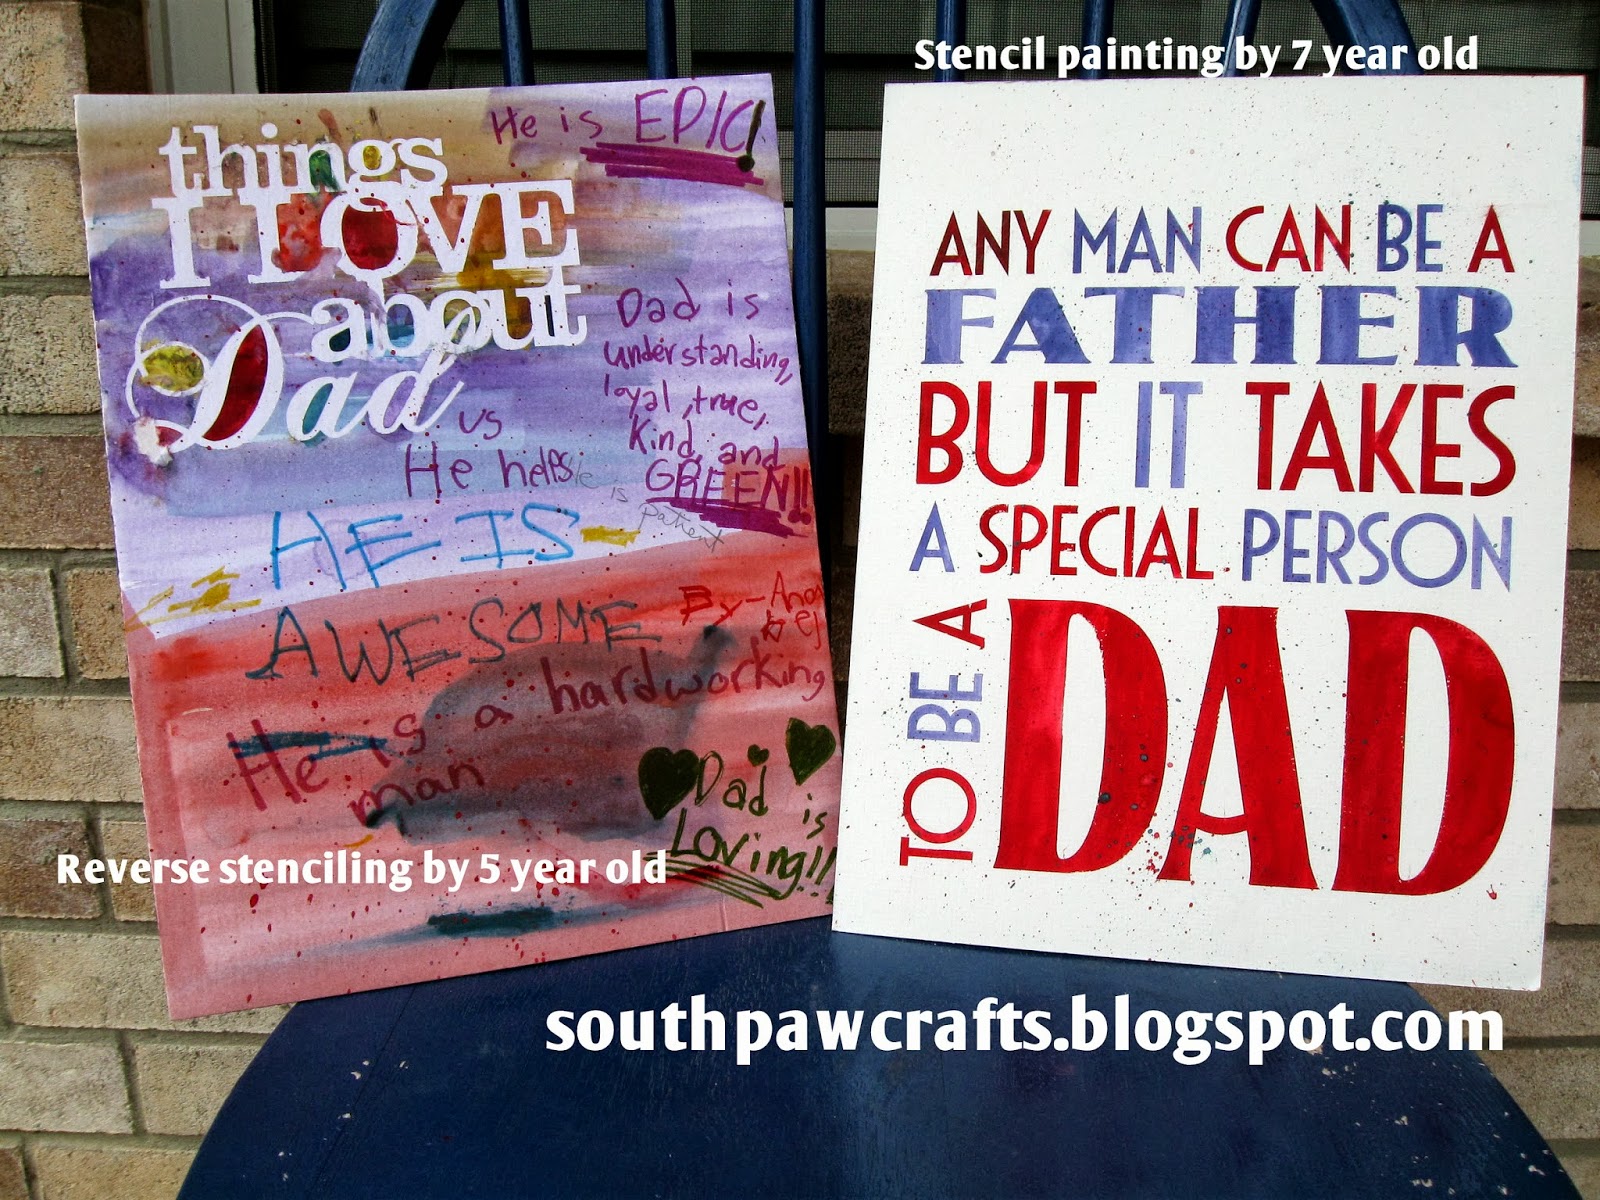
Thankful Thursday - plus pic of silhouette cameo created art by kids
Being positive and grateful is a good mental exercise and I'm feeling sluggish in that department. So since today is the 26th and I missed a week or two, I'm doing makeup exercises today.
Things I am thankful for:
#1 I'm thankful for my Heavenly Father and my Savior, Jesus Christ.
#2 I'm thankful for my husband. (I helped the kids make the artwork below for Father's Day.)
#3 I'm thankful for playgroup which gives me two hours of me time a week.
#4 I'm thankful for friends, even if they do move away.
#5 I'm thankful for music.
#6 I'm thankful that my kids are learning to play instruments.
#7 I'm thankful my parents insisted that I learn an instrument (flute).
#8 I'm thankful for blogging. It's a great creative outlet and I love seeing other people's creations too.
#9 I'm thankful for rain (we finally had some last week).
#10 I'm thankful for my bike and bike trailer. This morning another Mom and I went biking with our kid trailers in tow. We were passed by a group of "pro" bikers. I'm sure we made them smile - us and our mountain bikes and our kids!
Time's up (this was a timed exercise simply because I need to go pick up a kiddo from playgroup now).
Use your mental muscles and see how many things you can be thankful for in 5 minutes!
Things I am thankful for:
#1 I'm thankful for my Heavenly Father and my Savior, Jesus Christ.
#2 I'm thankful for my husband. (I helped the kids make the artwork below for Father's Day.)
| Kid Created Art (with help of the silhouette cameo) |
#3 I'm thankful for playgroup which gives me two hours of me time a week.
#4 I'm thankful for friends, even if they do move away.
#5 I'm thankful for music.
#6 I'm thankful that my kids are learning to play instruments.
#7 I'm thankful my parents insisted that I learn an instrument (flute).
#8 I'm thankful for blogging. It's a great creative outlet and I love seeing other people's creations too.
#9 I'm thankful for rain (we finally had some last week).
#10 I'm thankful for my bike and bike trailer. This morning another Mom and I went biking with our kid trailers in tow. We were passed by a group of "pro" bikers. I'm sure we made them smile - us and our mountain bikes and our kids!
Time's up (this was a timed exercise simply because I need to go pick up a kiddo from playgroup now).
Use your mental muscles and see how many things you can be thankful for in 5 minutes!
Saturday, September 21, 2013
Fall Ombre Sign Craft
My friend Maria and I hosted a craft day this week and we made the beautiful Fall sign pictured. If you are local (San Antonio) and would like to join us contact me at southpawcrafts (at) gmail (dot) com and I'll let you know when our next craft day is.
Monday, July 15, 2013
How to Make Your Own Free Vinyl Storage Containers
I finally found a way to store my rolls of vinyl and it's FREE! I made a quick stop at the local liquor store and asked if they had any boxes. After scoring 5 boxes and some puzzled looks from my children (who I promptly reassured that the only time I go to a liquor store is if I need sturdy boxes with dividers), I finished my errands and ran home to get started.
First remove the top flaps with your handy dandy razor blade cutter. Second, use some spare contact paper and cover the boxes. I just covered the sides and the top inside edge of the box. The advantage of the zebra stripe print is that it doesn't show the wrinkles very well.
Here's a quick visual for you:
First remove the top flaps with your handy dandy razor blade cutter. Second, use some spare contact paper and cover the boxes. I just covered the sides and the top inside edge of the box. The advantage of the zebra stripe print is that it doesn't show the wrinkles very well.
Here's a quick visual for you:
You can't even see most of the vinyl in the before picture because it was being stored in my dresser. Now I can easily see what vinyl I have and know better when to reorder. And I can actually use the copy feature on the printer without moving tons of stuff. :)
The liquor store box solution might not work if you have lots of heavy rolls of vinyl, but it works perfectly for me.
Labels:
organization,
vinyl
Subscribe to:
Posts (Atom)