Showing posts with label craft cutter tips. Show all posts

Thursday, January 30, 2014

Future Missionary Onesie

Any occasion is a good occasion for crafting so when my sister had a baby boy (the first name carrying male for her in-laws) I just couldn't resist.

I used silhouette studio to craft my own "Future Missionary" name tags. It is cut out of black heat transfer vinyl and then the letters are weeded out to reveal the white shirt underneath.

The tie was a little trickier. I used a solid tie shape from the silhouette studio and merged it with a stripe pattern (also from the silhouette store). After the stripes were the way I wanted I added an external offset of the tie to make the tie border. I cut a solid color tie for the background color and a black tie with the stripe parts weeded out as the second layer.

Things I liked about this project: I think it looks cute. I'm not much of a sewing applique type person so this fit the bill nicely. The name tag is priceless and professional looking.

Things I would change: two layers of heat transfer vinyl is really stiff for a baby onesie. So in the end next time I think I would go ahead and sew a fabric tie on the onesie with a heat transfer vinyl name tag.

Another option if I really wanted to stick with heat transfer vinyl would be to make a blue or red or green striped tie with white as the background color. A polka dot tie with white dots would be fairly simple to make also.

Friday, January 24, 2014

Personalized Fance Floral Tote - Craft Cutter Tips

I originally made this design for my etsy shop, but today I'm sharing my tips on how I did it.

First of all, I didn't waste an entire tote bag with a "Your Name" sample. I actually used craft vinyl to put the design on the bad temporarily. That way I can still remove the vinyl and have a tote bag to decorate with heat transfer vinyl.

First, find a background design you like. I used "floral lace" by Jamie Koay, design #17681. Since I intended to sell totes made with this design I purchased the commercial rights.

Second, use the straight knife function in the designer studio edition to cut your design into two pieces. Make sure you use the "Treat unfilled shapes as: solid" function.

Third, pick your favorite font and insert a name!

Fourth, size your design to fit your tote bag and remember to mirror image it before cutting in heat transfer vinyl.

Lastly, apply your design to your bag and enjoy a beautiful creation! (I use a heat press for professional results.)

File: floral bag name

Thursday, August 29, 2013

Cutting Poly Satin with Silhouette Cameo - Paying it Forward

It's Thankful Thursday. As I have started an online craft business I have gleaned helpful information from many people. Some I knew before starting my business. Others I "met" through online interactions with their businesses. Almost without exception everyone has been very kind in sharing their expertise. And I am thankful for their help.

So when a friend posted on FB that she was considering a cricut or a silhouette cameo and wanted to know if the cameo could cut poly satin material that she uses in creating super hero capes, I was happy to try it out for her before she decides what to buy. (And I love experimenting with new techniques and materials.)

A picture is worth a thousand words so I'll let the pictures do most of the explaining.

Cutting circles without interfacing - the fabric moves too much even with a sticky mat.

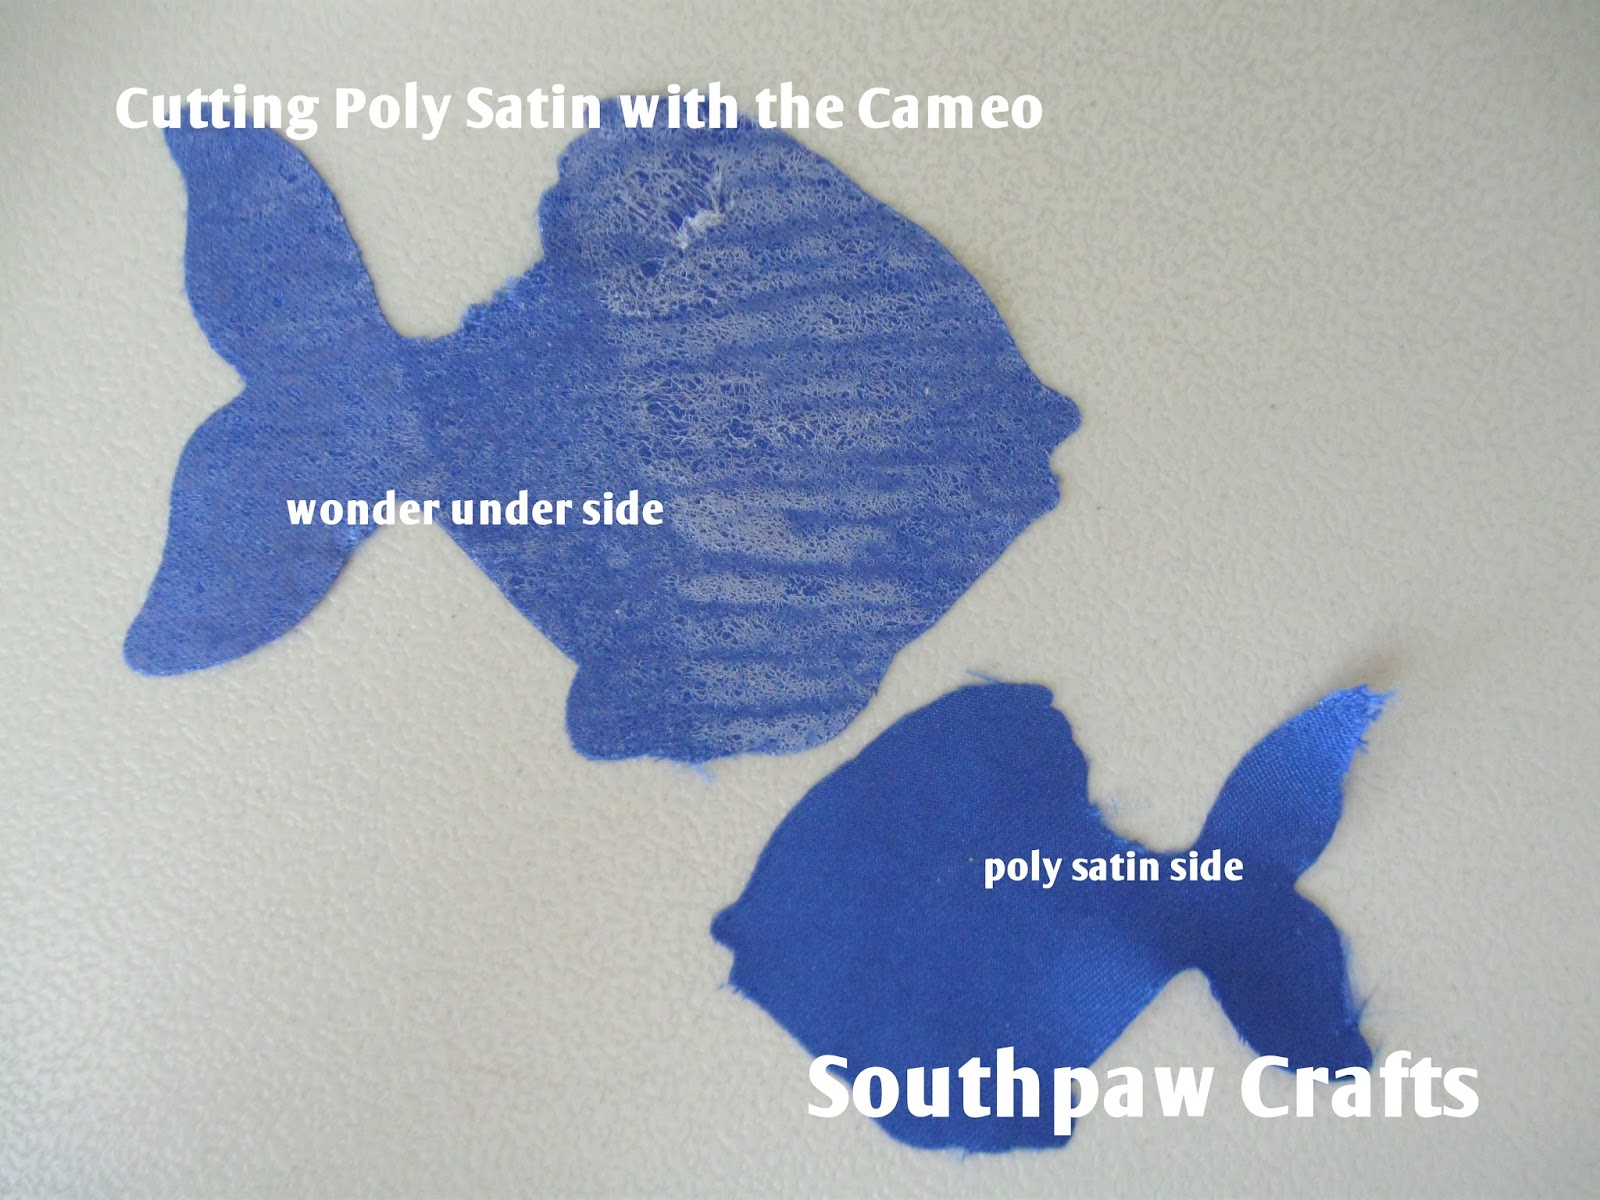
Cutting fish with wonder under interfacing with paper backing stuck to mat. Much better. This fish is approx. 4"x2.5".


Small fish was 2.5"x2". Better results with larger images to cut. Most of this fraying would be covered by topstitching your applique. The larger fish didn't fray much at all.

Cameo screen shot. Settings: speed-2, thickness-33(maxed), blade-10(maxed). Double cut.

It works!
Suggestions for perfecting the cut: fresh blade, better application of wonder under (only my second time using wonder under so I may not have done the best job of ironing it on), cut larger designs. You could also try starching the fabric to make it stiffer.

In the pictures you can see that I used a cricut mat in my silhouette cameo. Works great. Costs less!

Happy cutting!

Monday, August 19, 2013

Felt 3D box - a craft success


After my miserable craft fail I had to try my next outside the box idea. Fortunately this one worked like a charm (box).

  • One note about printing from silhouette, go to the "line style" option and select "print lines of selected shapes" at the bottom of that menu. You can also make the lines larger. For this example I think I used a 2 pt line.

 1. Print your pattern on freezer paper.
2. Iron freezer paper onto felt. Shiny side down, no steam.
3. Cut out.
4. Bend on dotted lines. I used a ruler to make sure I got a straight fold.

5. Use a razor blade/utility knife/exacto knife (whatever nickname you give yours) to cut the small openings.

6. Assemble. Then contemplate what kind of ring Robin Hood would give Maid Marian in this little box. Or if your box is a different color feel free to contemplate any other question that comes to mind.

Saturday, July 20, 2013

Kaleidoscope Card - a Silhouette project

Inspired by a kaleidoscope I created this "card." Really it's a bunch of squares with 6 pointed patterns that can be interchanged to create different kaleidoscope like creations. I used my Silhouette Cameo to design the shapes and cut them (and my handy sharpie for the sentiment because I'm that crafty!).
Kaleido Card Arrangement 1

Kaleidocard Arrangement 2
Kaleidocard Components

Friday, July 19, 2013

Cheap Sketch Markers for Silhouette Cameo

Thanks to a suggestion from a silhouette forum I discovered that dollar spot markers really do work in the silhouette! The challenge is figuring out how far down to place the marker in the little blue clamp. 


Sketch in Progress


Anchored in Perfection!


Simple designs work best. This one didn't work very well at all.

Saturday, July 13, 2013

Using Circles and Pentagons To Make 12 Sided Dice or Ball

This week's Silhouette (as in silhouette cameo cutting machine) challenge is to make something using circles. Inspired by a school project my daughter brought home a few weeks ago, I cut out 12 circles with embedded perforated pentagons.
 My pentaball cutting shape.

Here's how to make the pentagon shape using Silhouette Designer Edition.

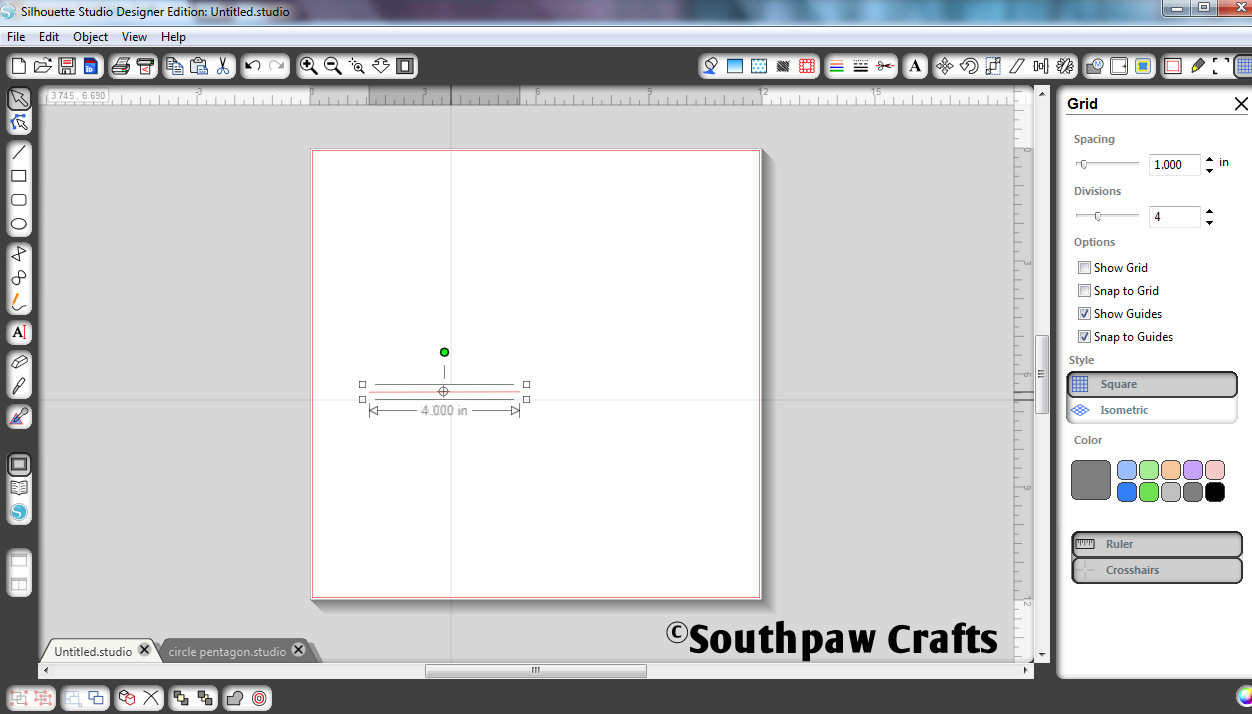
1. Draw a line. I made mine 4 inches.
 2. Move the rotation point (looks like a little target) to the end of your line. It kind of snaps in place. This feature is only available in the designer edition (and it's my favorite feature too). The crosshairs and ruler you see in this picture are also designer edition features.


3. Go to the replicate window and select advanced options. You should see something similar to the above screen shot. Select "1 copy," "custom position," change the x and y positions to 0.000 inches, and set the rotate angle to 108 degrees. Then press "Replicate" and you should get the above image.
4.Repeat by moving the rotation target to the other end of your new line and replicate again.
5. Repeat until pentagon is complete. Then combine the lines into one shape.
6. Set the lines to perforate instead of cut. And size to fit your circle (the centering feature doesn't really help so zoom in and eyeball it if you have to).


After cutting out 12 copies of your nifty shape, fold the edges of the circle up on the perforated pentagon lines. Then assemble with a stapler or glue (but I'm not patient enough to glue it).

Fold on the pentagon lines.

One half stapled together

Two halves.
Completed pentaball (I'm sure there is a real word for it, but I don't know it).

I put the numbers 1-12 on my 12 sided die and tricked my kids into practicing their math. They each got 5 rolls and the person with the highest total won!


This post joined the party at Gingerly Made

Tuesday, February 12, 2013

Valentine's "Boxes" - Cardstock in Craft Cutter Tips

Today I got inspired by my forced stay-at-home-because-my-kid-puked-this-morning status and decided to do something about those Valentine's Day Mailboxes my kids are supposed to bring to school this week.

I used my craft cutter to resize and cut out this heart box and the kids decorated them. I love that my 5 year old put "Mom" on one for me!

A few tips for those who are new to using craft cutters for cutting cardstock (that's me).

#1 Not all cardstock is created equal. My machine shredded one card and did the next one perfectly on the same settings.

#2 Not all cardstock in a multi-color pack is the same quality. The pink that shredded and the red that didn't were in the same pack. (Now if I could just figure out how to predict which colors are bad quality.....)

#3 I found it easier to roll the mat away from the cardstock than to pick the pieces off of the mat. Of course this problem may be solved with the removal spatula that I've been too cheap to buy!


#4 Every craft is easier without the help of a toddler. (Umm, yeah. I knew that but thought I could be super crafty mom anyway. Isn't she cute? Yes I'm biased I'm her Mom!)

What super craftiness have you been up to lately?

at createitgo.com
 photo 28535494b_zps93e8fa7e.jpg

I've linked to "Tag, You're It", and "Time for You" .

Related Posts Plugin for WordPress, Blogger...