Monday, December 30, 2013

Duct/Duck Tape Craft - Rose Pens - Kid Craft Critique

For Christmas, my 11 year old daughter got some craft supplies - Duck Tape (duct tape - whatever). Using the instructions on Ducktivities she and her 10 year old sister made these pens.

Here's the 11 year old Kid Craft Critique:

Clarity of instructions: 4 out of 5 (a little more instruction on petal placement would have been nice)
Fun factor: 3 out of 5 (dissatisfied with her pen)

And the 10 year old Kid Craft Critique:

Clarity of instructions: 4 out of 5
Fun factor: 5 out of 5 (she likes her pen - it's the one on the right in the picture)

I'm liking the Kid Craft Critic's assistance. They are excellent proof readers and capitalization experts too!

Saturday, December 21, 2013

Be You Tiful - Beautiful - T shirts FREE Silhouette file

FREE Silhouette Studio file (created by me) to make this great t shirt design! It's my birthday this week and I just wanted to share.

I love making meaningful items. I've seen multiple variations on the "be you tiful" phrase and I've made several of my own. These clearance t shirts were just begging for me to make them into beautiful inspirational tees for my girls. So I did of course.
white and silver heat transfer vinyl on beautiful blue shirt

purple and royal blue heat transfer vinyl on heather gray shirt
If you would like to make your own shirt using the same design you can download the silhouette studio file from this link (google docs) Be You Tiful dot studio file  Please respect my creations and only use this file for personal use. And this file only works with the silhouette craft cutters.

Because of my etsy store I have a heat press which is the best way to apply heat transfer vinyl. But if you are using a home iron here are some tips for the best results.

Race Medal Holders

A friend asked me to make one of these as a surprise gift for her husband who loves to run. She choose the quote "Always earned. Never given."

I used boards I already had cut and only had to buy the pegs and the hangers for the back.
Gift for a teen who loves to run and choose not to run a big name marathon on Sunday even though his training partners did. Go Chandler!


My eval: 
  • loved that I was able to make this for someone else. Their family has helped my family in many ways.
  • and it gave me an excuse to do something for Chandler to tell him I really admire his courage in making the right choice
  • it's nice to be able to use all my crafty "stuff" in meaningful ways
  • happy I was able to find a runner and make a few modifications (remove the frame using point editing)


Improvements for next time (the perfectionist in me hasn't died yet): 
  • pick a dark background color and use light lettering
    • could still be changed if the new owners want to paint over the vinyl and then remove the vinyl (reverse stenciling)
  • install 2 hangers on the back so it will hang even when medals (weights) are added
    • I think I'll retrieve the one I didn't do that on and fix it
  • put the hangers on before gluing the pegs in
  • add felt pads to the bottom corners so it hangs more evenly on the wall
    • or finally learn how to use the key hole router bit I own

Trivia (or not):

"run medal holder" (note to self)
used silhouette studio image "sports badge set" design #30246 
Arm Wrestler font

Thursday, October 10, 2013

Paper Clip Elastic Band Bracelets - No Loom Required

Last year I posted my own version of how to make a paper clip angel. My fascination with paper clips continues. Let's make paper clip elastic band bracelets!!


Supplies: elastic bands and crazy paper clips. I found elastic bands at JoAnns and Michaels. Hobby Lobby had a few also. The paper clips were at Walmart. If you can't find those specific paper clips you might be able to find other shapes in the office supplies.


And that's it. My 5 year old (with a long attention span and great fine motor skills) was able to make his own!

Thursday, September 26, 2013

Thankful Thursday - plus pic of silhouette cameo created art by kids

Being positive and grateful is a good mental exercise and I'm feeling sluggish in that department. So since today is the 26th and I missed a week or two, I'm doing makeup exercises today.

Things I am thankful for:

 #1 I'm thankful for my Heavenly Father and my Savior, Jesus Christ.
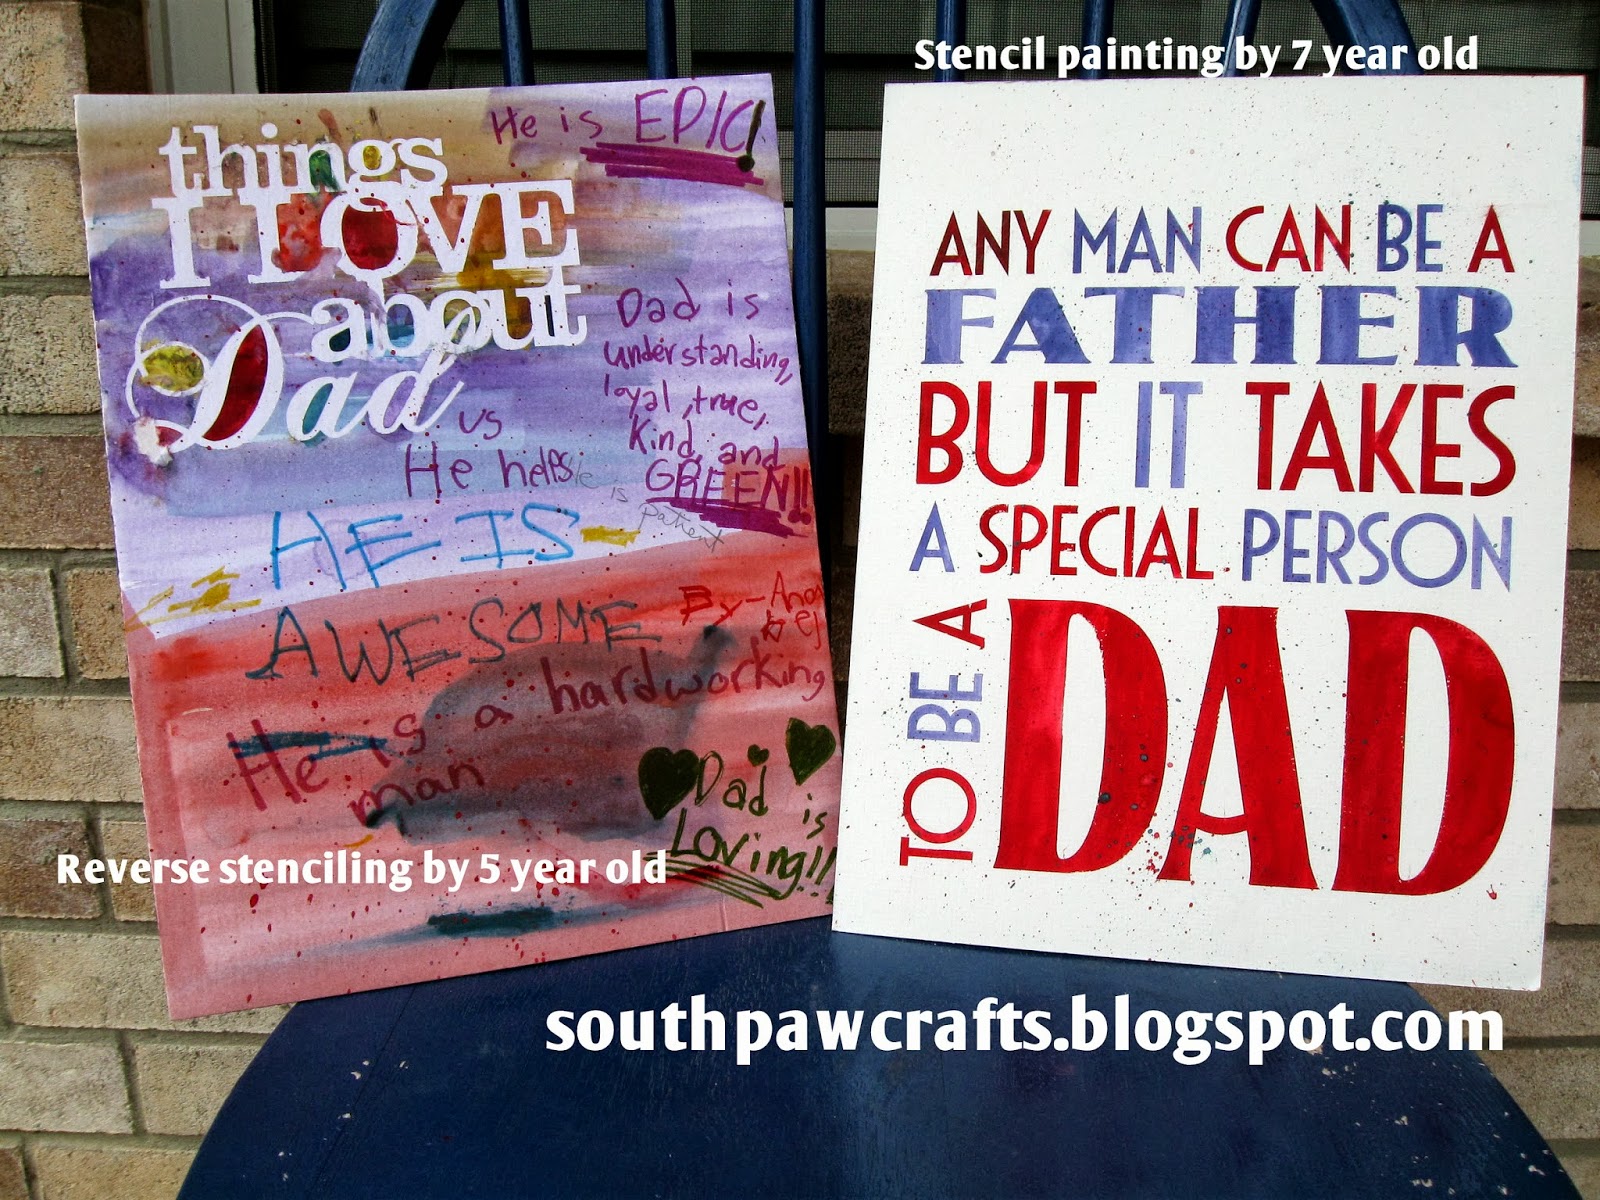
 #2 I'm thankful for my husband. (I helped the kids make the artwork below for Father's Day.)
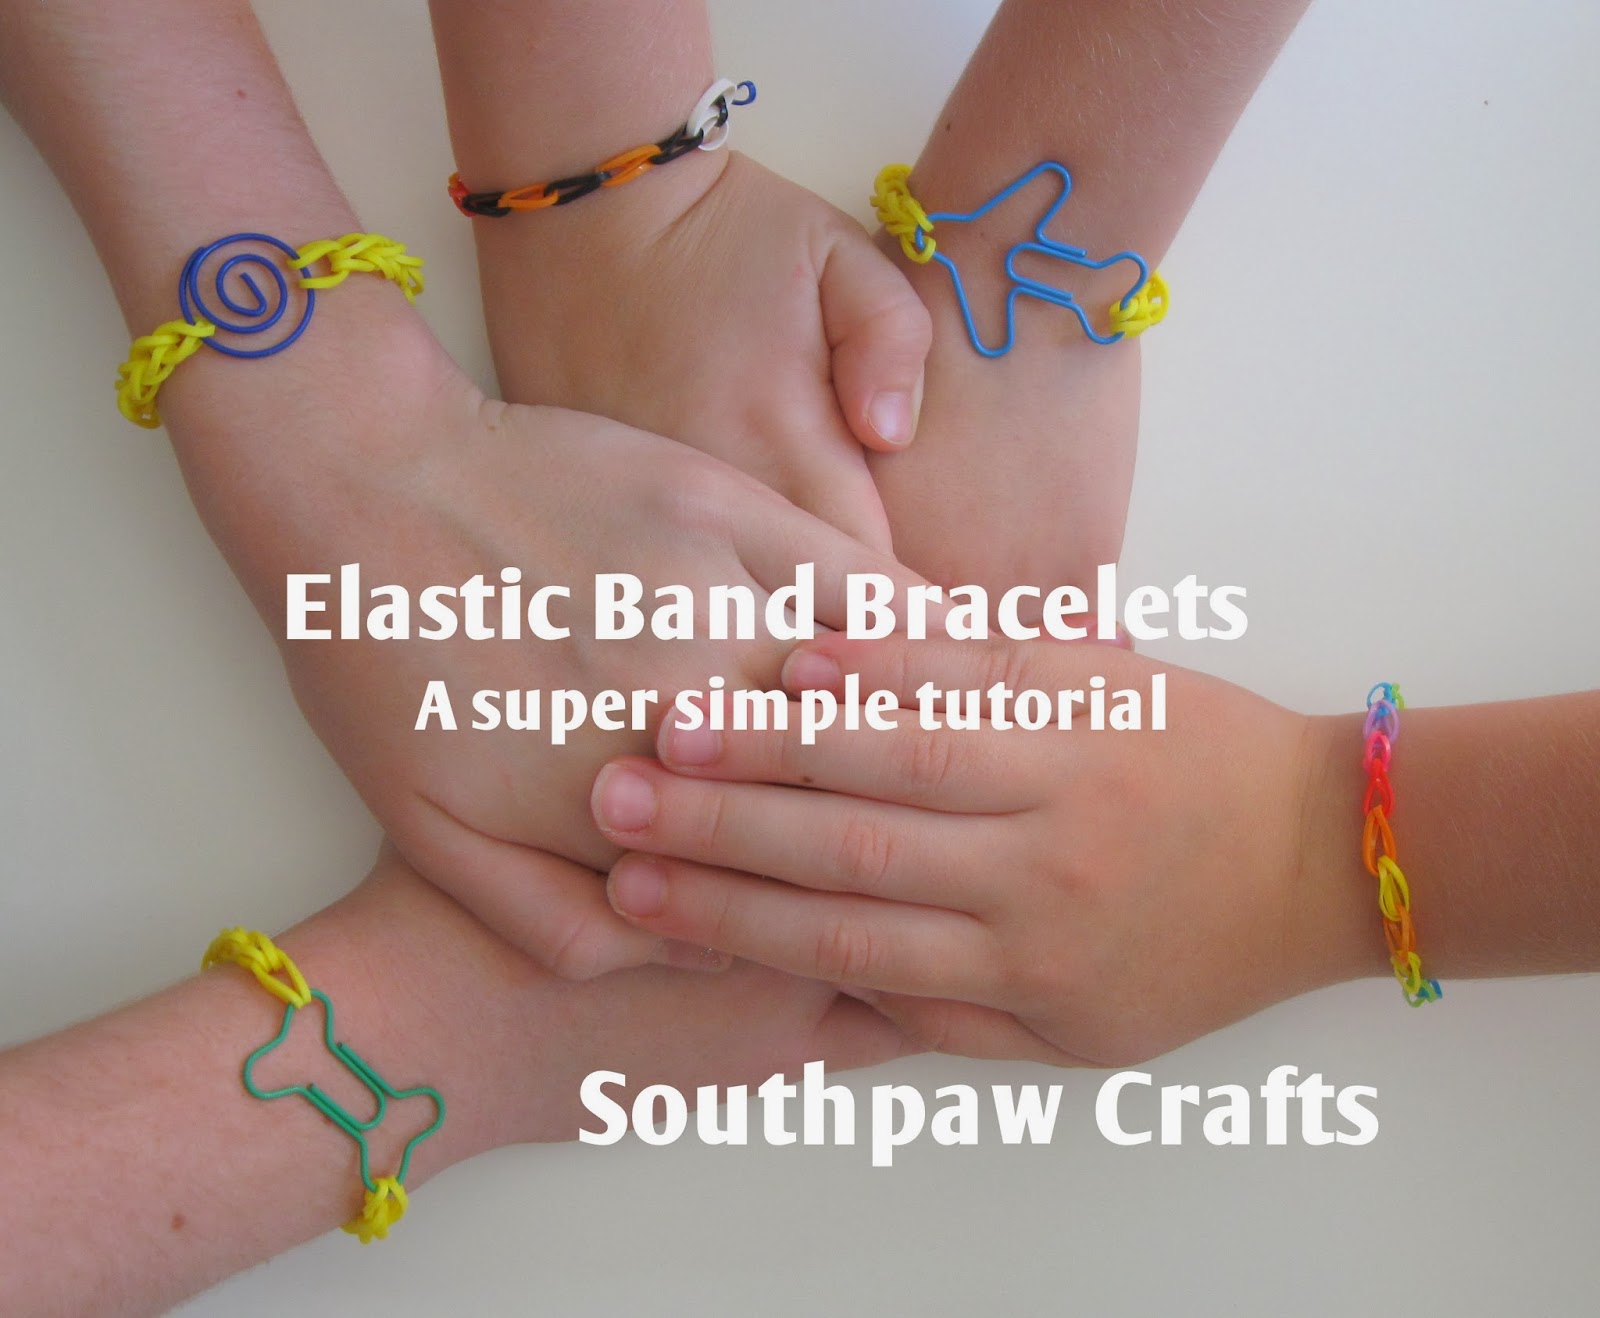
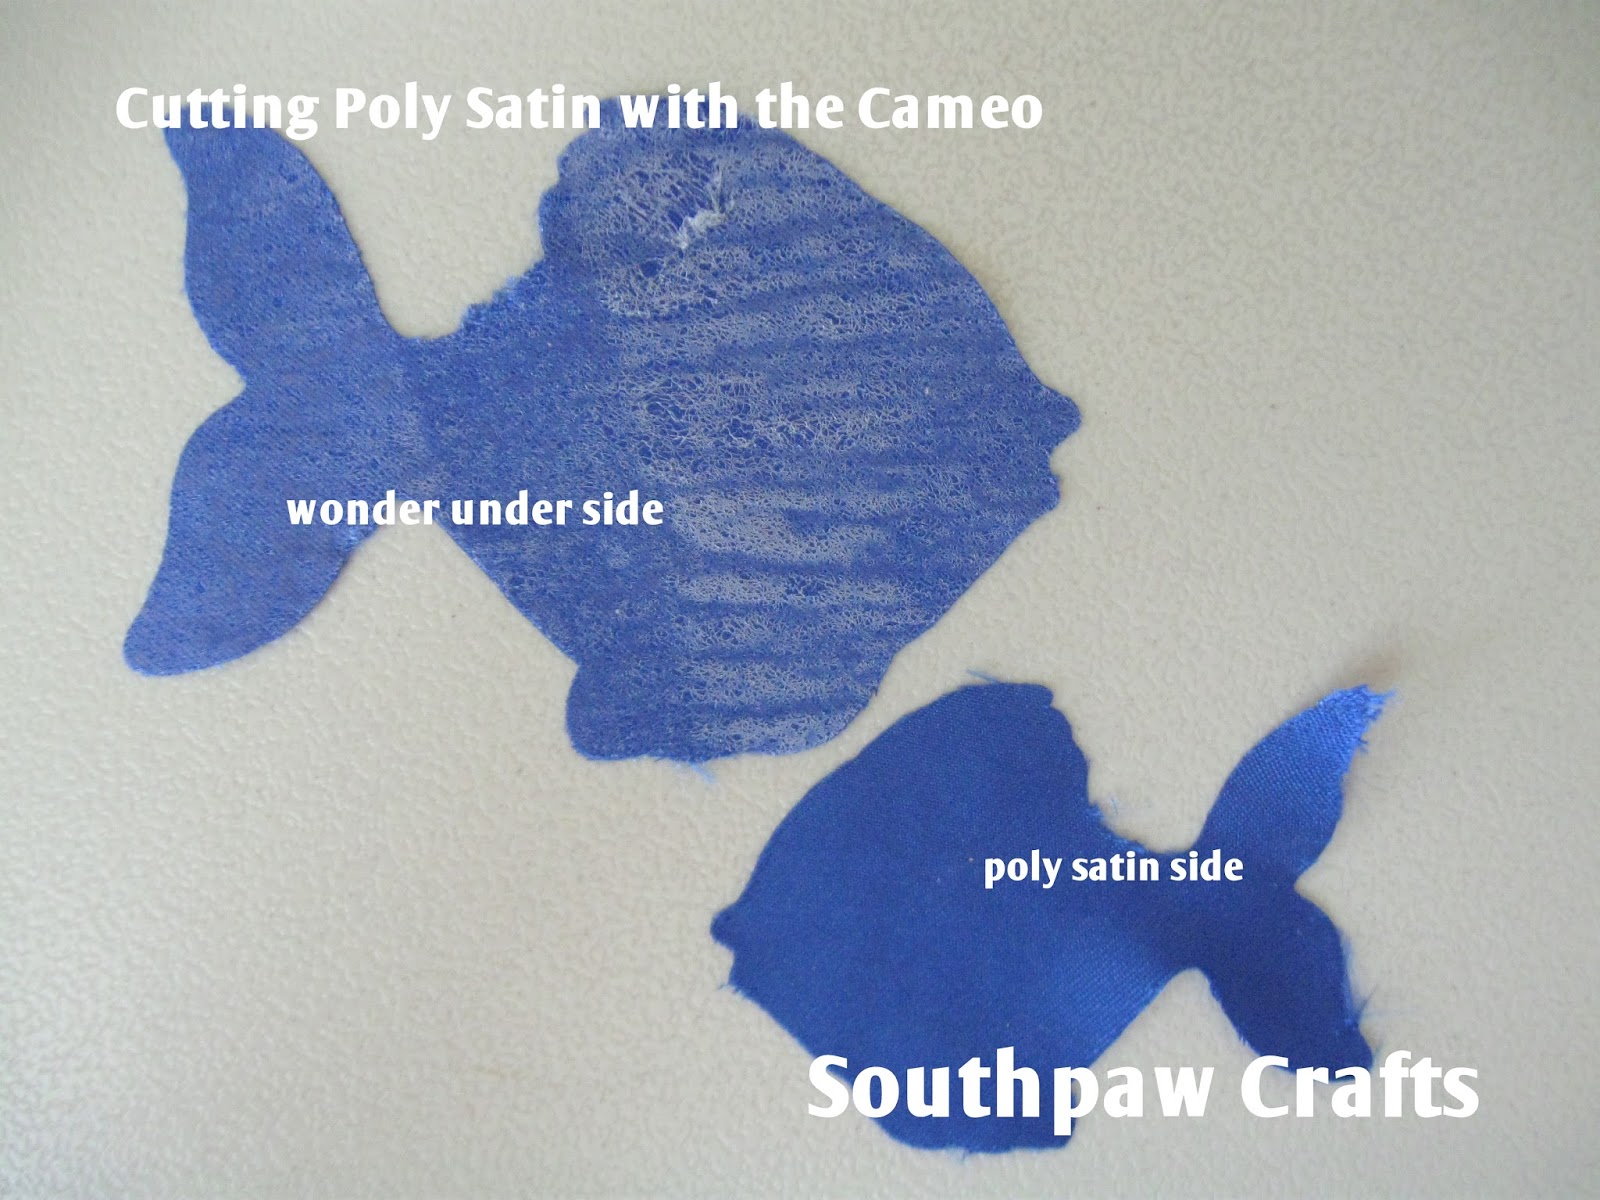
Kid Created Art (with help of the silhouette cameo)


#3 I'm thankful for playgroup which gives me two hours of me time a week.
#4 I'm thankful for friends, even if they do move away.
#5 I'm thankful for music.
#6 I'm thankful that my kids are learning to play instruments.
#7 I'm thankful my parents insisted that I learn an instrument (flute).
#8 I'm thankful for blogging. It's a great creative outlet and I love seeing other people's creations too.
#9 I'm thankful for rain (we finally had some last week).
#10 I'm thankful for my bike and bike trailer. This morning another Mom and I went biking with our kid trailers in tow. We were passed by a group of "pro" bikers. I'm sure we made them smile - us and our mountain bikes and our kids!

Time's up (this was a timed exercise simply because I need to go pick up a kiddo from playgroup now).
Use your mental muscles and see how many things you can be thankful for in 5 minutes!

Wednesday, September 25, 2013

Sewing Lesson Fun

Monsters with teeth and pocket mouths!
First time sewing! Notice the "stool" so he can reach the pedal.

Vinyl lettering on the penants - it's not cheating - it's SMART crafting!

Apparently even kindergarten students can sew on buttons.

Southpaw Crafts is offering sewing lessons for ages 7 and up starting in October (contact me if you live in San Antonio and are interested). As I've prepared the curriculum my own children have been my pattern/project testers. I've been very pleasantly surprised at how well they do. Once I told the boys they could use the sewing machine (with close supervision of course) they were super excited to make monsters and penant banners to personalize their room. (They have bunk beds so yes that is my ceiling you see in the picture. Don't look too close because cutting in paint lines isn't my area of expertise.)

Saturday, September 21, 2013

Fall Ombre Sign Craft

My friend Maria and I hosted a craft day this week and we made the beautiful Fall sign pictured. If you are local (San Antonio) and would like to join us contact me at southpawcrafts (at) gmail (dot) com and I'll let you know when our next craft day is.

Friday, September 6, 2013

Mailing Packages is Fun to Do

Here's a little pic of what I've been doing lately. I love my customers and fellow music lovers!


Thursday, August 29, 2013

Cutting Poly Satin with Silhouette Cameo - Paying it Forward

It's Thankful Thursday. As I have started an online craft business I have gleaned helpful information from many people. Some I knew before starting my business. Others I "met" through online interactions with their businesses. Almost without exception everyone has been very kind in sharing their expertise. And I am thankful for their help.

So when a friend posted on FB that she was considering a cricut or a silhouette cameo and wanted to know if the cameo could cut poly satin material that she uses in creating super hero capes, I was happy to try it out for her before she decides what to buy. (And I love experimenting with new techniques and materials.)

A picture is worth a thousand words so I'll let the pictures do most of the explaining.

Cutting circles without interfacing - the fabric moves too much even with a sticky mat.

Cutting fish with wonder under interfacing with paper backing stuck to mat. Much better. This fish is approx. 4"x2.5".


Small fish was 2.5"x2". Better results with larger images to cut. Most of this fraying would be covered by topstitching your applique. The larger fish didn't fray much at all.

Cameo screen shot. Settings: speed-2, thickness-33(maxed), blade-10(maxed). Double cut.

It works!
Suggestions for perfecting the cut: fresh blade, better application of wonder under (only my second time using wonder under so I may not have done the best job of ironing it on), cut larger designs. You could also try starching the fabric to make it stiffer.

In the pictures you can see that I used a cricut mat in my silhouette cameo. Works great. Costs less!

Happy cutting!

Monday, August 26, 2013

Cheap Family Fun - marshmallow wars!

This week I changed the song "it's a marshmallow world in the winter..." to "it's a marshmallow war in the kitchen." For some reason b-o-r-e-d spells f-i-g-h-t for some of my children. To disrupt this cycle I needed something creative and constructive for them to do. I'm not sure that marshmallow wars are constructive, but they met the creativity requirement and the supplies were already on hand. So the battle commenced.

Battle Equipment Needed
  • balloons (we used 9" round balloons from the dollar store)
  • cups (we used old sippy cups that were about to be retired and an ancient plastic cup - I found that my disposable plastic cups were too flimsy for the job)
  • ammo - marshmallows (pom poms would work too - if it's edible the ammo is more likely to be retrieved and not scatters throughout your house for weeks on end)


Tactical Planning

  • I found that a box cutter was the best weapon for cutting the cups. (Of course the children should be granted amnesty from this task. And your weapon of cup destruction should be heavily guarded to prevent friendly fire injuries.)
  • Cut the tip off of your balloon before putting a knot in the end of it. (That way it's easier to make a straight line with your almost-never-used-for-quilting rotary cutting equipment - scissors work fine too)
  • Don't cut too much off of your balloon. It needs to still have some curve to the help the balloon stay on the cup.
  • Ammo works best when placed in the "belly button" of the weapon and shot in an arched fashion. It may fall out if you try to shoot straight or down.
  • Beware - you are now a target! 
  • Feed the children before war so they get some nutrition in for the day! (The 2 year old probably ate way too many marshmallows, but was thrilled to be the ammo retriever and deactivator.)
  • Informal testing concludes that marshmallows are relatively painless. 


Ammo works best when placed in "belly button" of shooter.

not so LEGAL TEAM fine print: Play at your own risk. Marshmallow shooters are weapons of mass hilariousness and should be treated as such. Extended play includes risk of stomachache.

Thursday, August 22, 2013

Creativity in Kids

A friend introduced me to TED Talks and the first one I listened to (and I've only listened to 3 more since) was a talk given by Ken Robinson titled "How Schools Kill Creativity".  My take away quote was this: "If you are not prepared to be wrong, you will never do come up with anything original."

This summer we have been cultivating creativity at our house. Most of the time this is fabulous and wonderful, but I have to admit not being too excited about my children learning how to climb door frames.

I am thankful for creativity and that my children can harness their imaginations to entertain themselves and their siblings.


Monday, August 19, 2013

Felt 3D box - a craft success


After my miserable craft fail I had to try my next outside the box idea. Fortunately this one worked like a charm (box).

  • One note about printing from silhouette, go to the "line style" option and select "print lines of selected shapes" at the bottom of that menu. You can also make the lines larger. For this example I think I used a 2 pt line.

 1. Print your pattern on freezer paper.
2. Iron freezer paper onto felt. Shiny side down, no steam.
3. Cut out.
4. Bend on dotted lines. I used a ruler to make sure I got a straight fold.

5. Use a razor blade/utility knife/exacto knife (whatever nickname you give yours) to cut the small openings.

6. Assemble. Then contemplate what kind of ring Robin Hood would give Maid Marian in this little box. Or if your box is a different color feel free to contemplate any other question that comes to mind.

Friday, August 16, 2013

Print on Fabric Craft FAIL!

Today I up got inspired to try my hand at printing on fabric. 

  • I took out my roll of freezer paper (fresh from the baggie aisle in Walmart or probably stale by now since I've had it for years). 
  • I cut several pieces to 8 1/2 x 11 so they would fit through the printer. 
  • Then I ironed it onto white cotton fabric (actually a sheet from Target that I have been using for various projects).
  • I selected two images from my silhouette collection. I changed one color so I would have yellow to test also.
  • Then I printed the file on printer paper and on two pieces of fabric.
  • The fabric went through the printer just fine with the freezer paper backing.


  • As you can see, method 1 did not work. Simply soaking it in vinegar did not set the ink. In fact it seemed to erase the ink. Maybe if I had let the ink sit for a few hours before the vinegar rinse it would have been different? I don't know.


  • Method 2 - heat set - I used my heat press and pressed it on medium pressure for 20 seconds at 350 degrees. It looked good so I decided to wash my towels (and my craft experiment). Craft FAIL!
What kind of craft failures have you had? And have you had success in printing on fabric and getting it to stay!?!

Thursday, August 15, 2013

Can you be a positive influence in the world?

Do you ever wonder if what you do makes a difference? Do you wish you could be a positive influence in the world? You can!

A few weeks ago I noticed a suggestive/inappropriate picture on the front page of etsy. I already have my etsy account set to filter mature content. I was disturbed that this picture was there. And it kept showing up for several days. Then I started to see pictures of underwear listed on the front page.

I am a Mom first and foremost and everything I do is visible to my children (except that secret Christmas shopping of course). I want the images I see online to be appropriate for all ages. After I was certain this wasn't just a one time event, I contacted etsy to say that as an etsy seller this was not acceptable and I would consider taking my store elsewhere if necessary. I never received a reply, but I'm happy to say the listings have been more appropriate since then.

Be the good you want to see in the world!

Monday, August 5, 2013

Marvelous Monday - Fridge Menu System and Dishwasher Magnet

dishwasher clean/dirty magnet
Organization is a constant battle. The kitchen is a frequent battle front. In an effort to have more quality conversations with my husband than, "is the dishwasher clean?" I created a dishwasher clean/dirty magnet. And then I just had to create about 5 more because they were so fun to make.

Mr. South likes the magnets. His overall comment was, "you know I suggested something like this about two years ago." My reply, "yes, but I didn't have a vinyl cutter back then."

Grocery shopping and meal planning is another battlefield. After weeks (literally - I'm not kidding) of trying to figure out the perfect menu board I came upon the perfect solution for me. Might not work for you, but I love it. It's a dry erase vinyl menu board on the fridge. So it can be used with menu cards held on by magnets (if I ever get that organized) or dry erase. 

Monday, July 29, 2013

Out of Pocket

Hello friends - the shop is on vacation mode for a few days. And since I misplaced my superwoman cape I'm going to put the blog on vacation mode for a few days too.  But as we all know there is no such thing as vacation for a mom. It's just a different type of adventure involving children and lots of patience (and hopefully some fun too).

Friday, July 26, 2013

Minecraft Throw Pillows with HTV

Today I'm over at My Vinyl Direct sharing a tutorial for Minecraft Throw Pillows. Go check it out!
If you'd like to try making your own, I have provided the minecraft silhouette studio file I created on my google drive. It's not quite perfect, but it worked for me. :)

Thursday, July 25, 2013

Thankful Thursday - Safety

This week I had a near car accident. I was driving on a two lane road at 50 mph and noticed a car coming towards me (also at about 50 mph). The driver was apparently distracted because the 1/3 of the oncoming car was in my lane. I swerved and they noticed they were drifting badly and corrected. No one was hurt (and I stayed on the road), but my heart was racing for a few minutes.

So let's all remember when driving that driving safely is number one priority. Don't let electronics (cell phone, mp3 player, whatever) put our safety at risk. Now if only screaming children were as easy to turn off as electronics........

Monday, July 22, 2013

Marvelous Monday - Gallery Ledge Shelves Complete!!

Thanks to plenty of pinterest posts and inspiration I decided to bite off a big project. I followed the instructions from Shanty 2 Chic. (The original instructions are found at Ana-White.com.) I don't have a kreg jig so I just used screws to put it all together. I painted the shelves with the same paint I used on the wall. Then I myself (with my girls holding the shelf up while I drilled and screwed) put the shelves on the wall.

The good: I LOVE having room to display pictures, artwork, chore charts, recent craftiness, etc. I LOVE being able to easily change it out. I love not having to straighten pictures after every door slamming event (yes my perfect little angels occasionally slam doors). I love putting covering my thermostat. AND Mr. South even says he likes it!

The bad: this project took me SOOOOOOO long. I'm glad I bought the wood already cut to size. And I probably could have skipped using the round over bit on the top edges of the shelf (not in the tutorial, but if you own a router ya' gotta' use it, right?). But this seriously took my 5 different 1-2 hour sessions to complete. Probably not such a lengthy project for others, but with my particular crew (ages 11, 9, 7, 5, and 2) that was the best I could do.

The ugly: the screws attaching the shelves to the wall. I didn't bother to paint over them or anything because I figure they will be covered by all the pictures and artwork.

Saturday, July 20, 2013

Kaleidoscope Card - a Silhouette project

Inspired by a kaleidoscope I created this "card." Really it's a bunch of squares with 6 pointed patterns that can be interchanged to create different kaleidoscope like creations. I used my Silhouette Cameo to design the shapes and cut them (and my handy sharpie for the sentiment because I'm that crafty!).
Kaleido Card Arrangement 1

Kaleidocard Arrangement 2
Kaleidocard Components
Related Posts Plugin for WordPress, Blogger...